Build forms and analyze the user submissions in the admin panel in the Open as App web portal. Creating mobile forms based on Excel has never been easier.
Users can submit values from Input & Output elements to the app's protocol.
The admin of the app sees all transmitted values in the app's protocol. Submitted data can also be processed into any other system using webhooks.
Note:
If you want to submit values directly into the Excel file used as your data source, use a Table element.
In this article
- Capture images in the app and save them in the protocol
- View and download the collected data
-
Create an app based on the collected data
- Connect your app to external services and processes by using webhooks
Capture data based on your spreadsheet
- Create an App
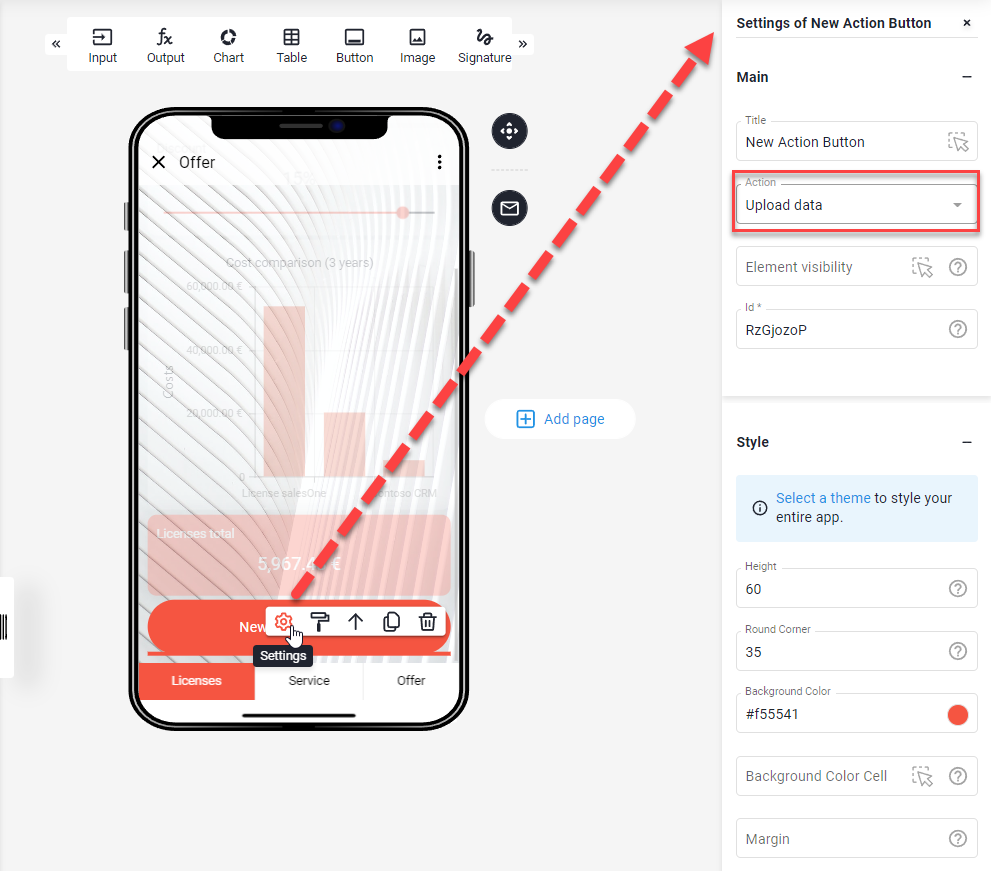
- Create a Button with the 'Upload data' action
Everything is ready now, and your app is waiting to be shared and used with other people. Submitted data can be viewed in the protocol as described in View and download the collected data.
Capture images in the app and save them in the protocol
You can capture images in the app or select images from your device and upload them to the server when submitting the data. The images are stored in the Microsoft Azure West Europe Cloud of Open as App. The link to the image is stored in the protocol of the app.
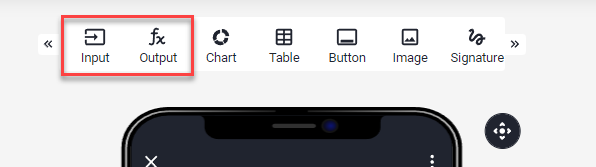
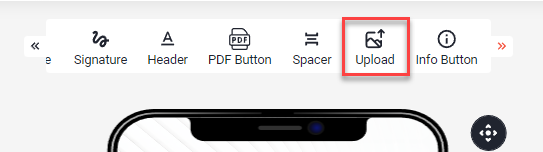
To capture an image, you need a corresponding input element in your app. Add this element from the selection:
Then define the address - i.e. a cell from the data source with which this element communicates.

This gives you a photo upload element in your app.
Note:
This element is not yet displayed in the preview and is not supported by the web client. Always check the changes in the native client for iOS and Android.
The photo upload element will look like this:
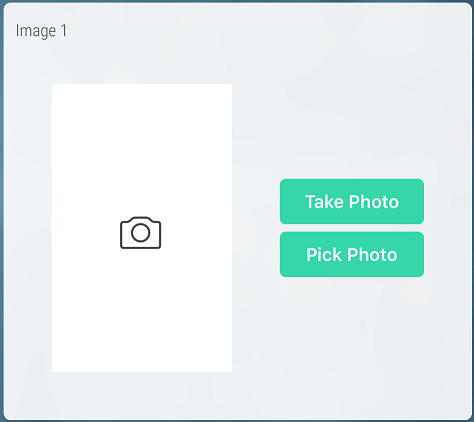
When uploading the data from the app, the image file is saved online and the link to this file is saved in the log.
Heads up
The image files are not inserted into the source file so that they do not appear in the PDF printout (yet).
If you create an app based on this protocol as described in the section "Create an app based on the collected data", you can see the images there directly. Make sure that the column type of the column in which the links to the images are located is defined as "image".
View and download the collected data
You can see the data users have uploaded in your app in the change protocol.
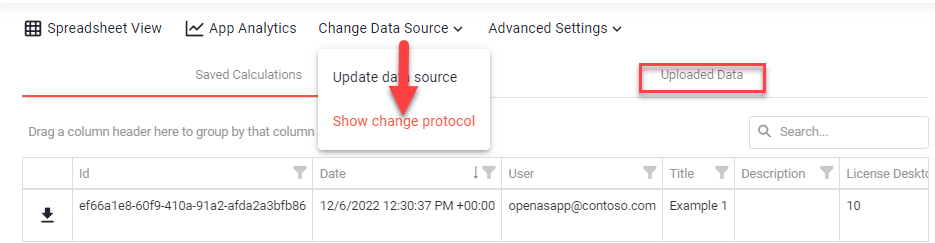
To view the change protocol, proceed as follows:
- Open the app in the web portal
- Go to "Change Data Source"
- Select "Show change protocol"
- Uploaded Data
The change protocol can also be downloaded as a complete excel file and handled further. You can import this file into one of your systems, for example.
- Open the app in the web portal
- Go to "Manage Data"
- Select "Show change protocol"
- Download

Create an app based on the collected data
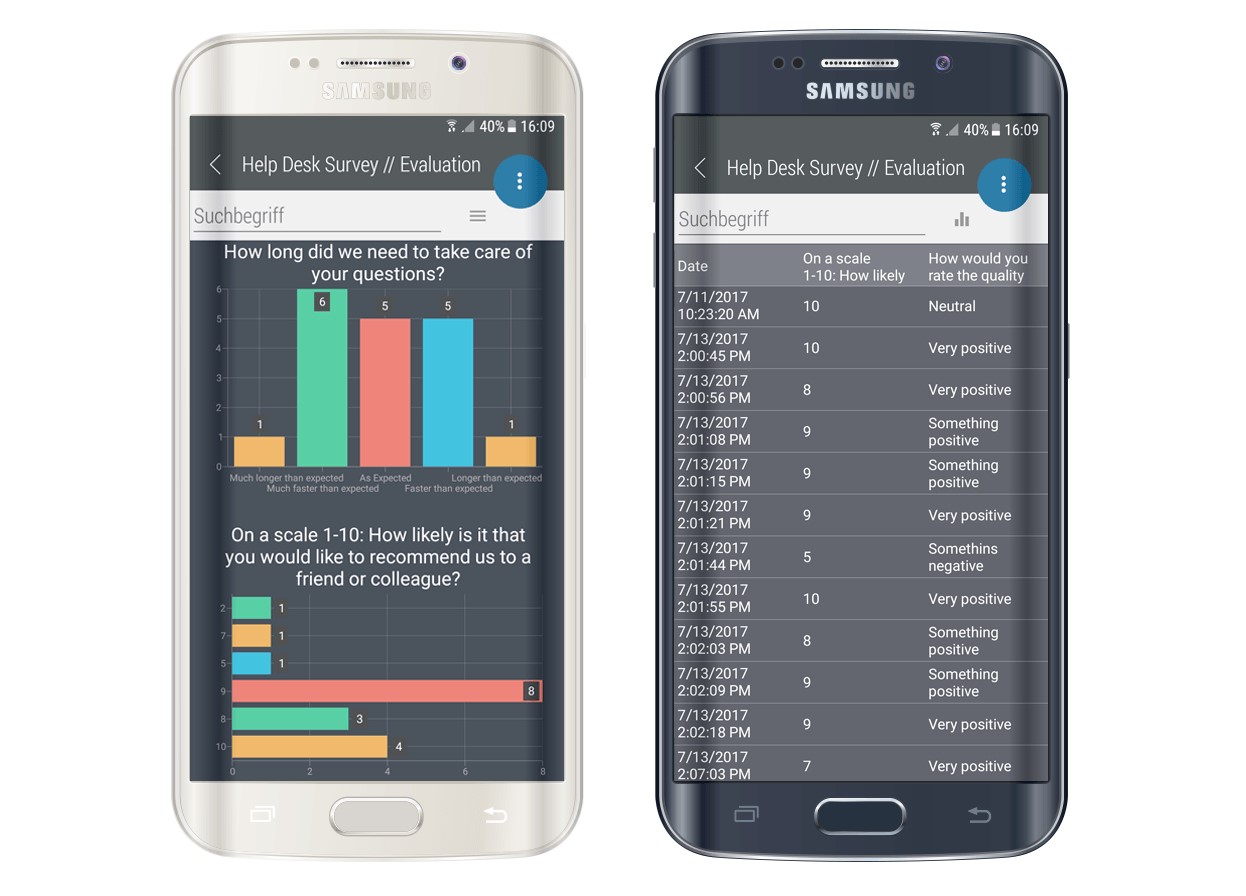
In the previous section, you learned how to download the server-side log as a .xlsx file. Each time you click the download button, you will be redirected to a URL where the file is generated on-demand.
You can use this URL as a data source for creating your evaluation app! Every time you check the evaluation app for updates, a new copy of the log is loaded into your app. List Analysis Charts (if activated in your app) will be updated as well.
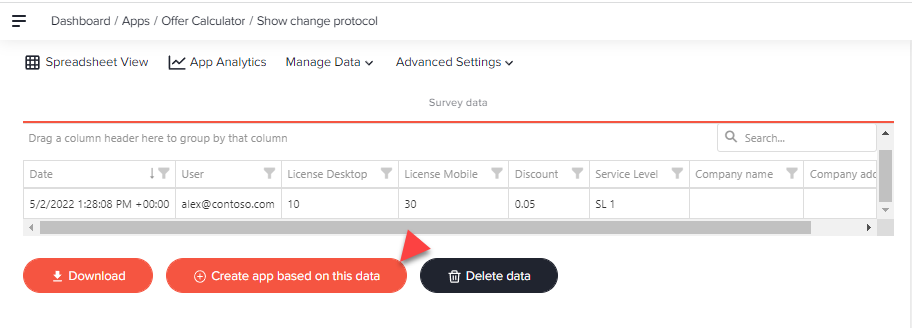
To create an app based on this data, proceed as follows:
- Open the app in the web portal.
- Go to "Manage Data".
- Select "Show change protocol".
- Click the "Create an app based on this data" button to start the app creation process with the server-side log.
Note
This data can only be viewed through a table and customized within the table's capabilities.
Editing/changing data is not possible.
Connect your app to external services and processes by using webhooks
Instead of uploading that information to the Open as App log, you can connect external web services and let the app send the submitted data to this source.
From there you can trigger any process you like and automate your workflows by connecting various tools, steps, and processes.
- Go to App Settings
- Open the Webhooks section
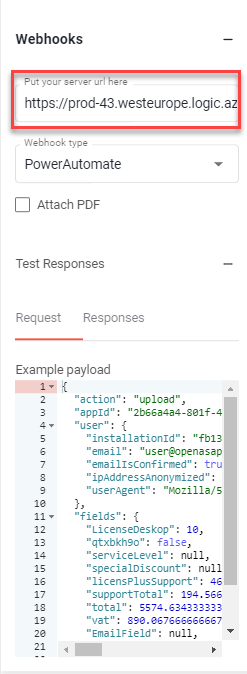
- Insert your server URL
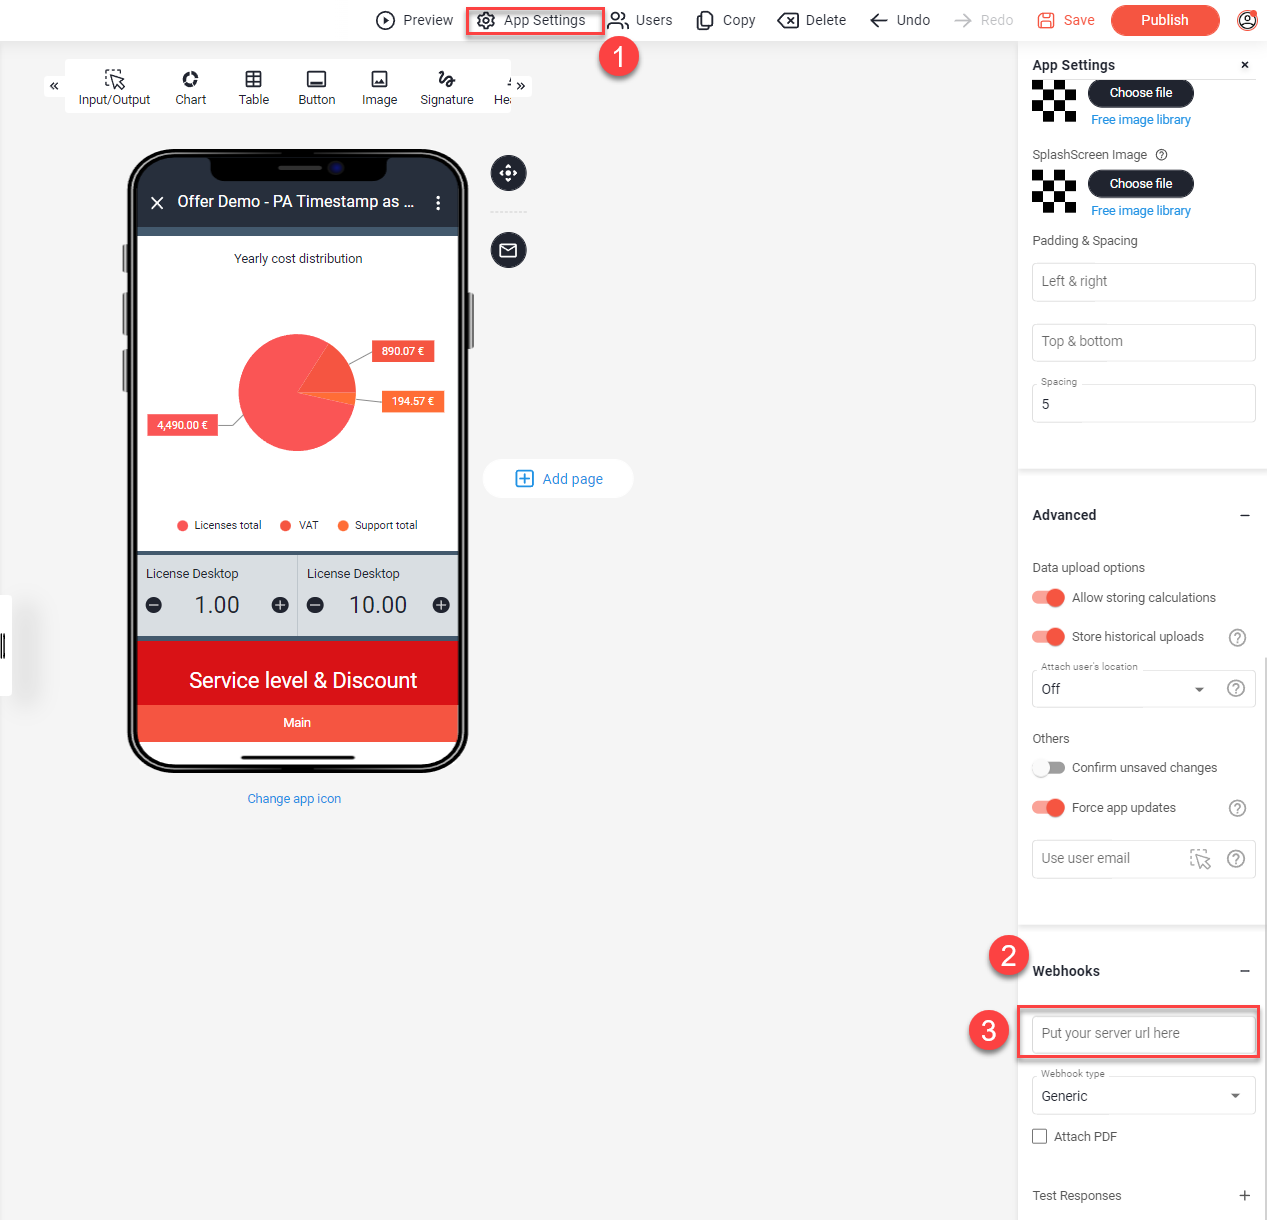
To get the Server URL / Webhook and process the collected data using Open as App, you can use tools and Platforms like MAKE or Microsoft Power Automate. Of course, you can also write your web service within your infrastructure.
Note
It will take a few hours to get into this if you're starting… Also, learning how the flows work, etc., will take some time, but we think this can get powerful in process and workflow automation.
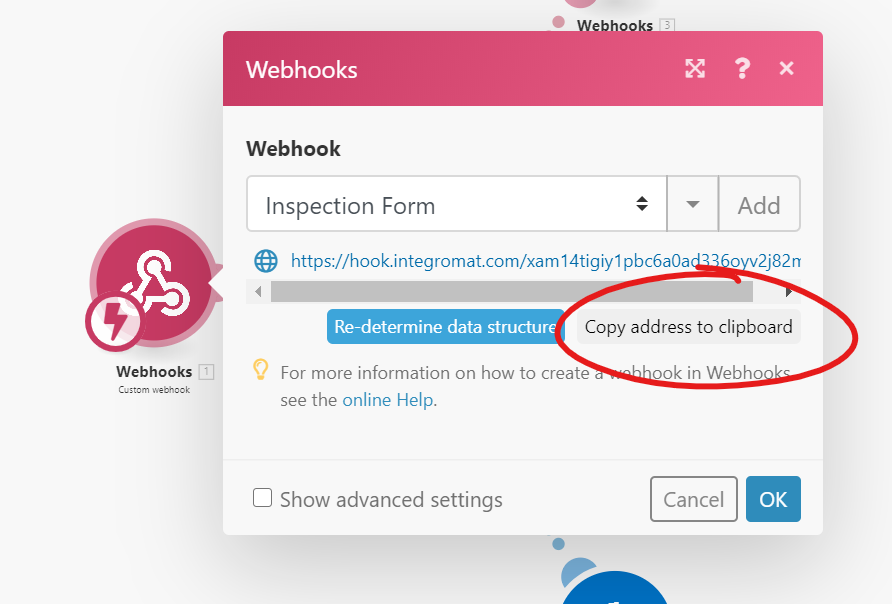
Connecting Open as App with Make
To get a webhook address, use the “Webhook”-Element in Integromat. Copy the address from there and paste it into the webhook input field of your app as described above. That’s it.
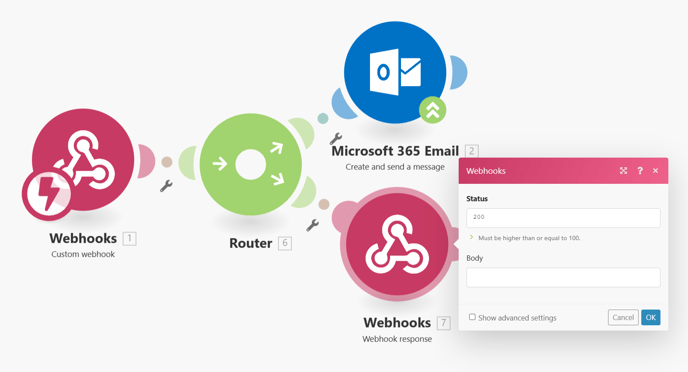
As the app expects a response when the data has been submitted successfully, you have to add a Webhook response with the proper status to prevent the app showing an error in all cases:
Connecting Open as App with Microsoft Power Automate
Connecting your Open as App with Microsoft Power Automate is slightly more complex compared to MAKE, but we hope this guide will help you through the steps.
Tip
Feel free to check out Azure Logic Apps as an alternative to Power Automate.
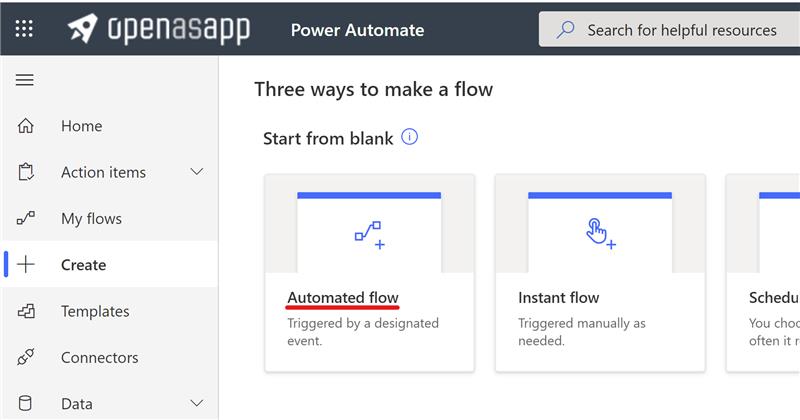
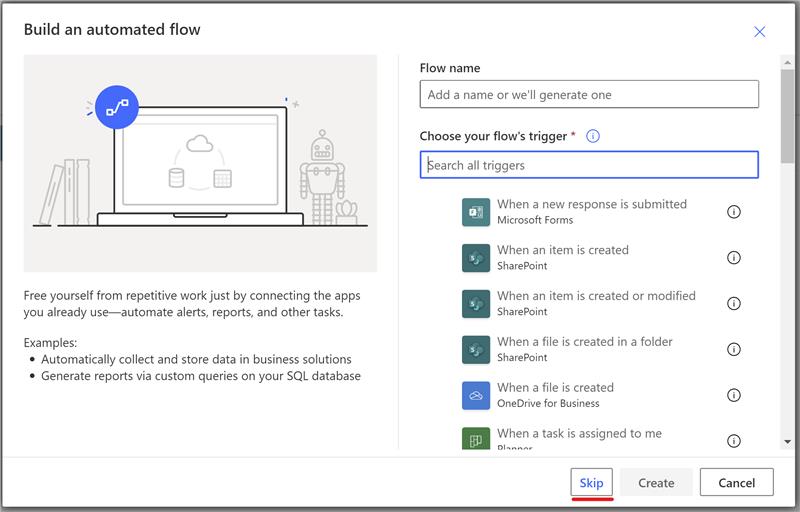
- Start from a blank with an automated flow
- Close the popup to get to the design area > skip
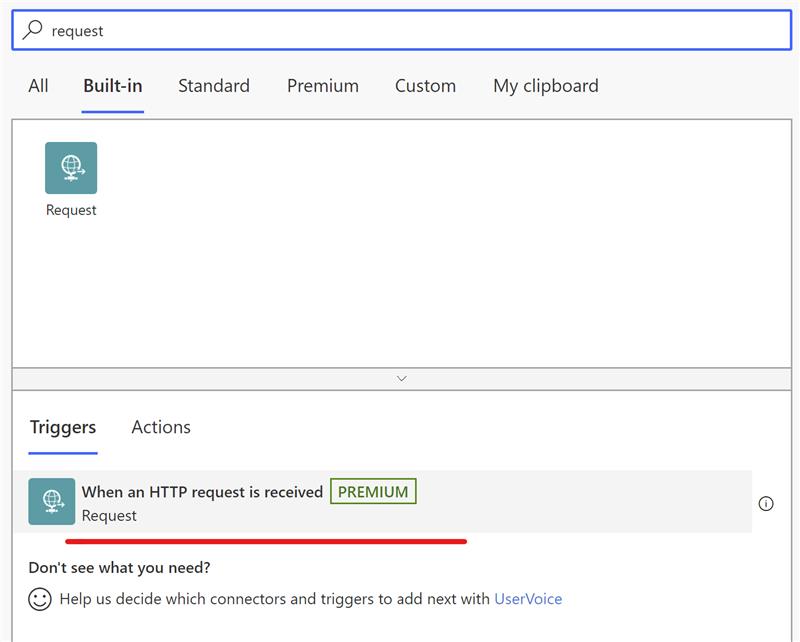
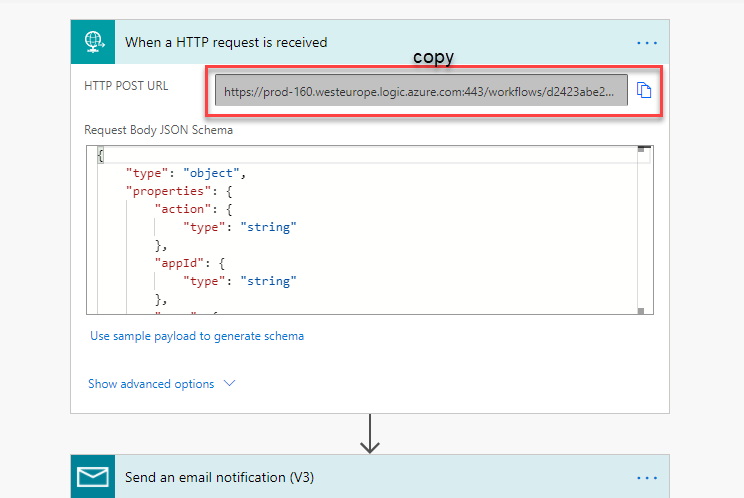
- Chose the Request - "When an HTTP request is received" trigger from the list of built-in triggers
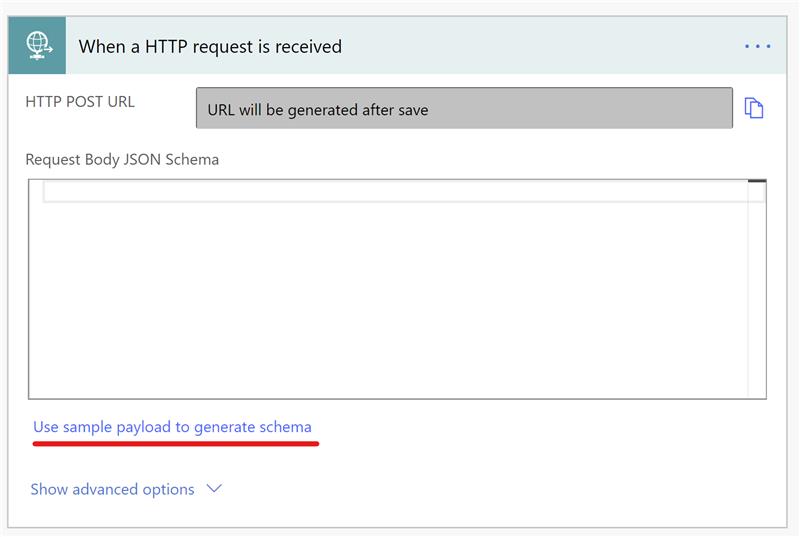
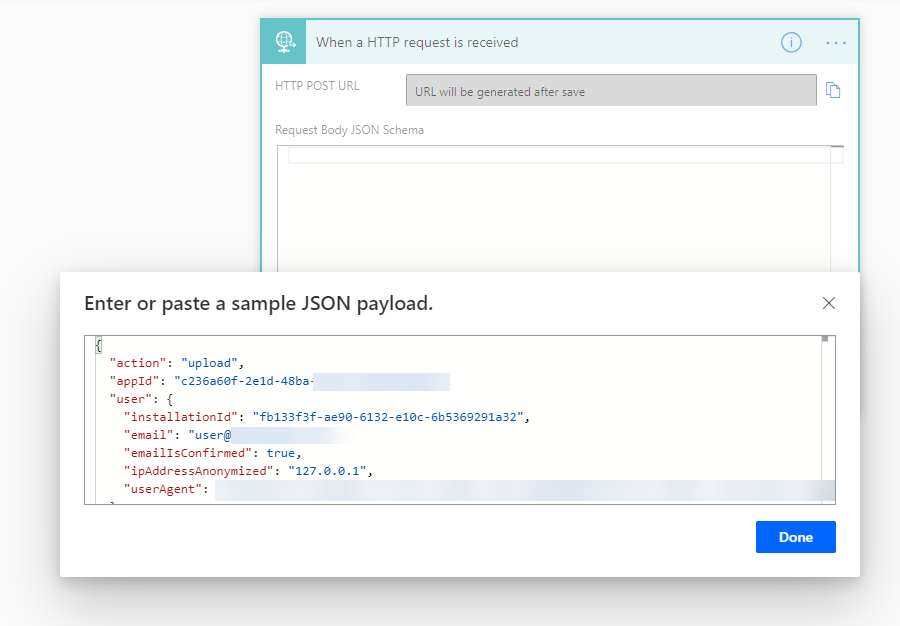
- Click the "Use sample payload to generate schema" link
- Paste an example payload from your app (Advanced > Connect to Webservice).
- Select webhook type (1) - PowerAutomate
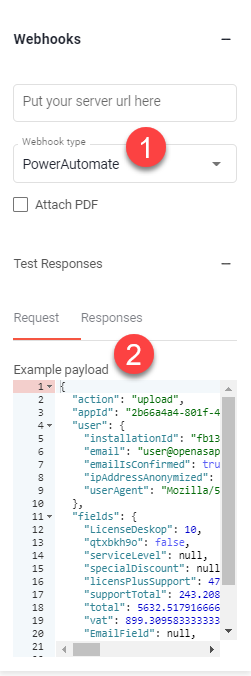
- Get the example payload (2) from Open as App and paste it to the sample payload in Power Automate.
- After creating the flow in Power Automate, copy the automatically generated URL.
Note
Power Automate needs at least one Action after the Request trigger for the flow to be saved and the URL to be generated.
and paste it into the Server-URL field in your app: