
A table can be a simple inventory or customer list. The logic from the Excel file is of course retained in the table element and can be extended with additional functions so that you can continue to work with calculated values line by line.
In this article
DATA SOURCE PREPARATION & TIPS
The more structured the data, the better you can work with it in the table element. Please note the following points:
- Empty columns: Do not interrupt the flow of your list by placing individual fields outside the table structure or using empty columns. Especially if you want to collect data, it is recommended to place the list area on a separate worksheet in the source file. Calculations based on the list area can also be performed on another worksheet (e.g. "Sum column B of worksheet 1").
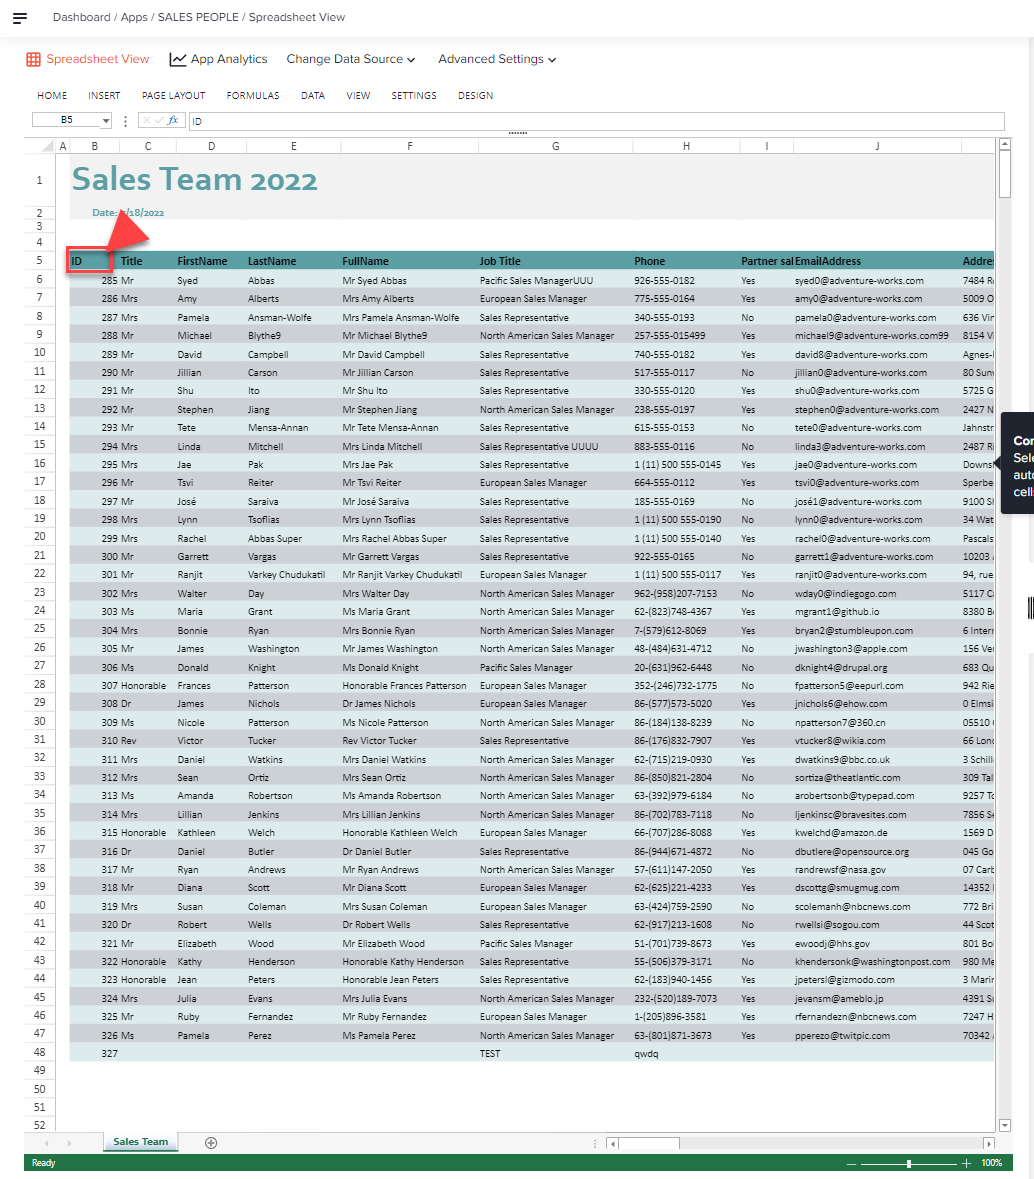
- Header line: A list contains the column headers in the top line. We automatically recognize these headings and assign them to the individual values in the lines below.
- Merged cells: One cell = One value. Linked cells or cells with multiple entries cannot be analyzed and should, therefore, be restructured or removed.
Note:
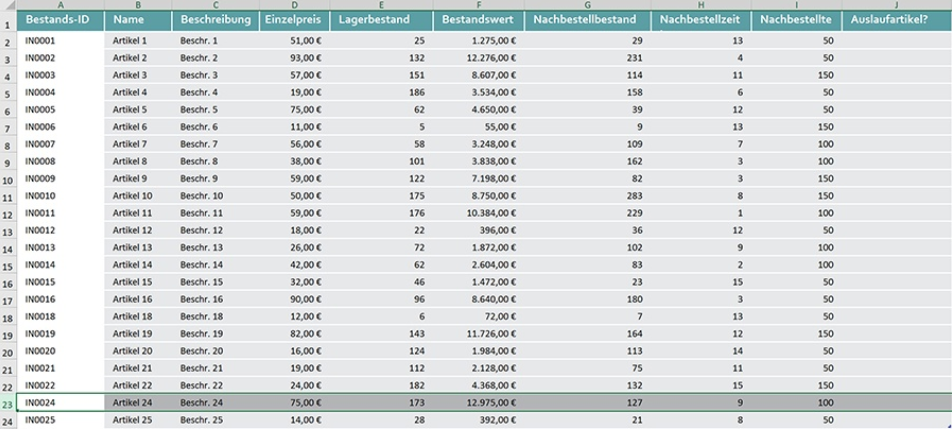
The table in the image below is optimally formatted for creating your app.
SELECT DATA RANGE
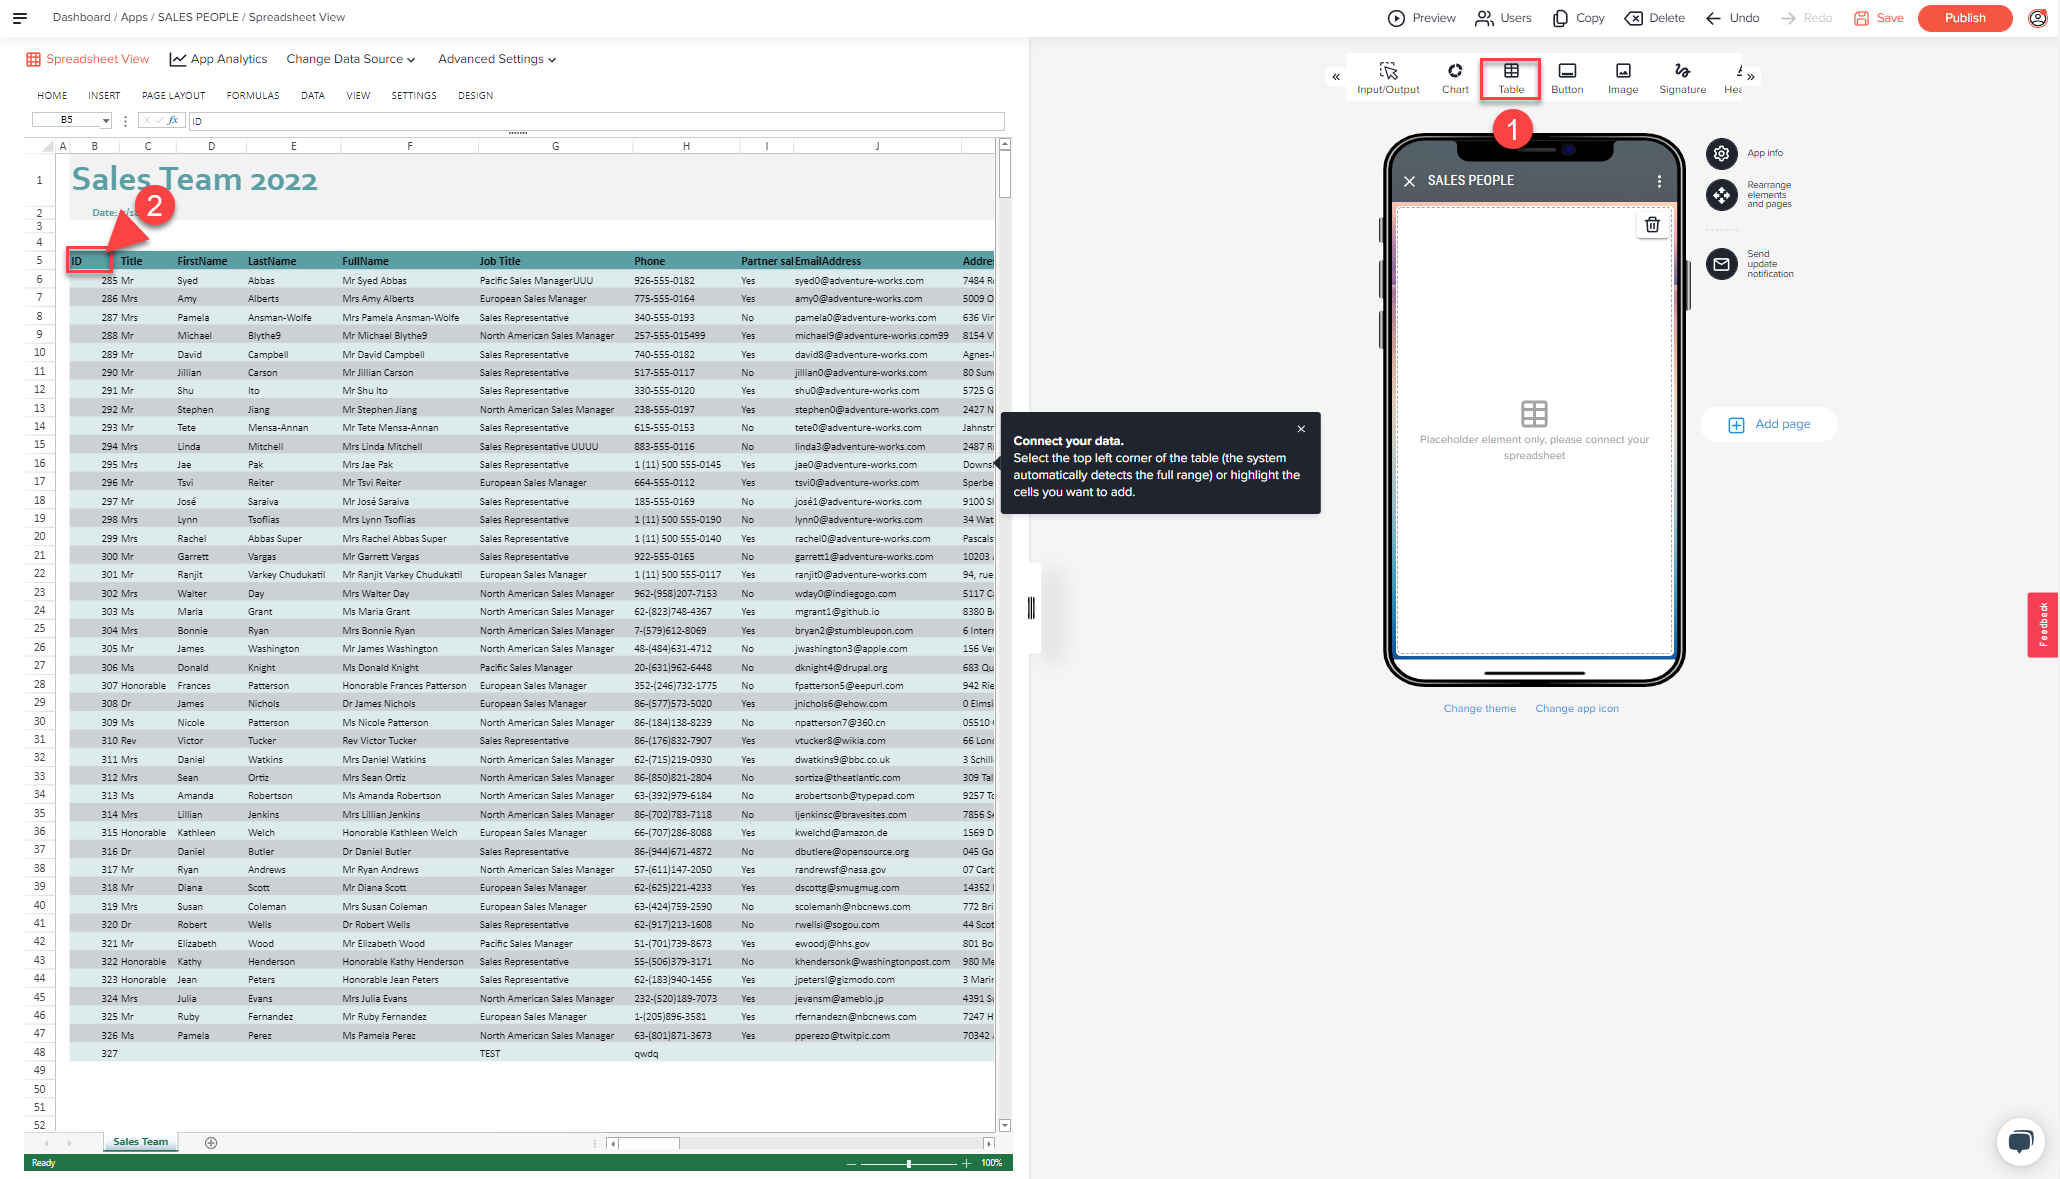
- Select 'Table' from the element selection box.
- Connect the Table element with your spreadsheet by selecting the top left cell where your data begins (the system automatically detects the full range). Alternatively, you can highlight specific cells/an area if you want to show only a subset of the data in your app.
- The data is then visualized in the Table element.
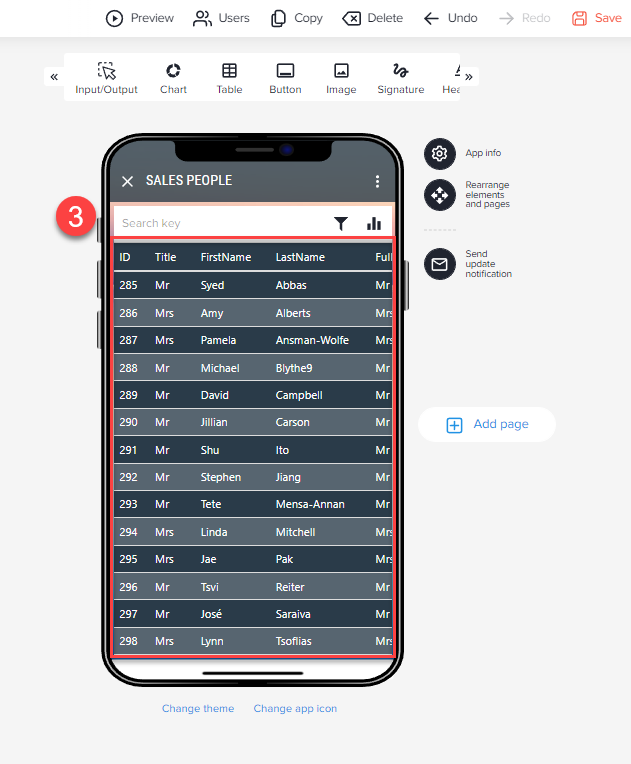
TABLE TYPES
The Grid view is the initial representation of your data. Under 'Table Type' you can choose between different display formats.
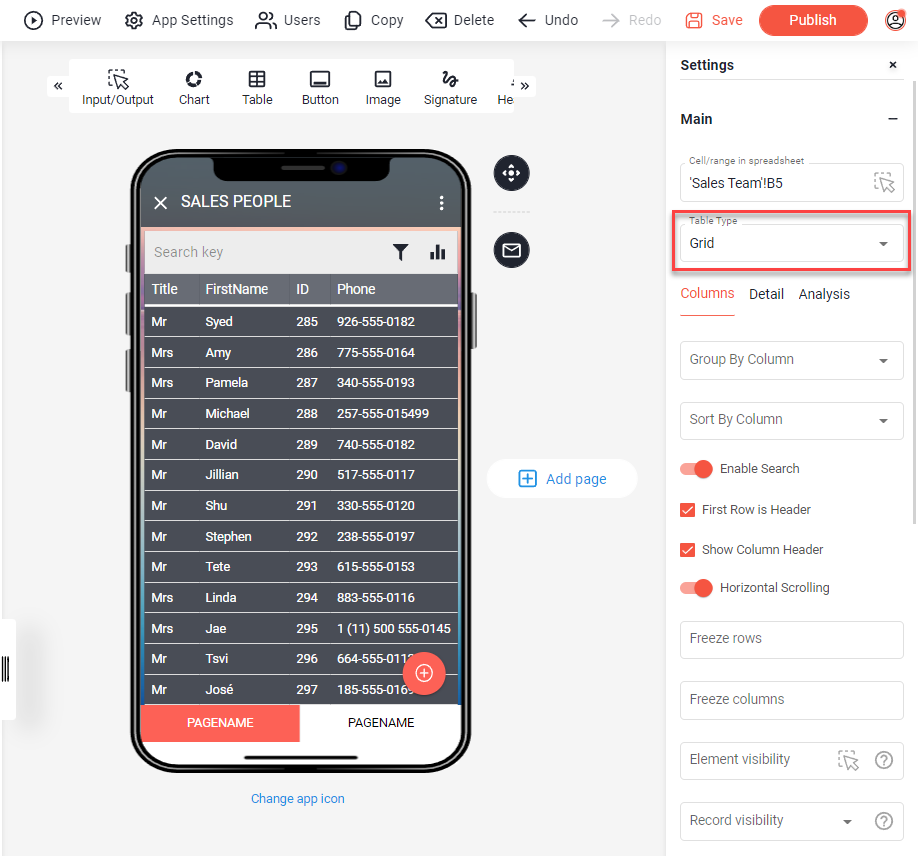
Depending on the data contained in your table, visual preferences, or desired functionality one of these types might be a good fit for your app:
- Grid
An Excel-like representation of your data - Cards with Thumbnail
Each row will be visualized as a card. If an image column is contained the image will be shown as a thumbnail on the card. - Hero Image Cards
Each row will be visualized as a card. If an image column is contained the image will be shown as the main image on the card. - Background Image Cards
Each row will be visualized as a card. If an image column is contained the image will be used as the background of the card. - Simple List
A minimalistic contact list-like view. If an image column is contained the image will be shown as a thumbnail for each row. - Calendar
Each row will be visualized as a dot or bar in the calendar. To display the data in a calendar, each row must contain values for the start and end date. The start and end dates must be in separate columns in the table and formatted as dates with time like here: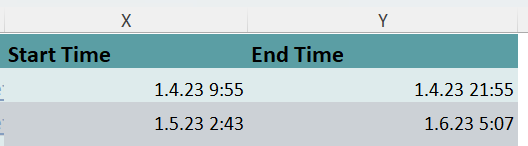
- Map
Each row will be visualized as a pin on a map. To display the data on a map, each row must contain values for the Latitude and Longitude values like here: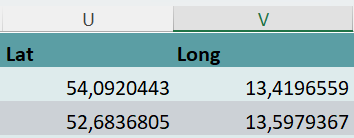
Having this setup properly will also activate an additional column that will show the distance to the address from the user's location. Additionally, a map on which the record is displayed will be added to the detail dialog:
Note:
For all views except the Grid, only the first three visible columns (+image) of the list are displayed.
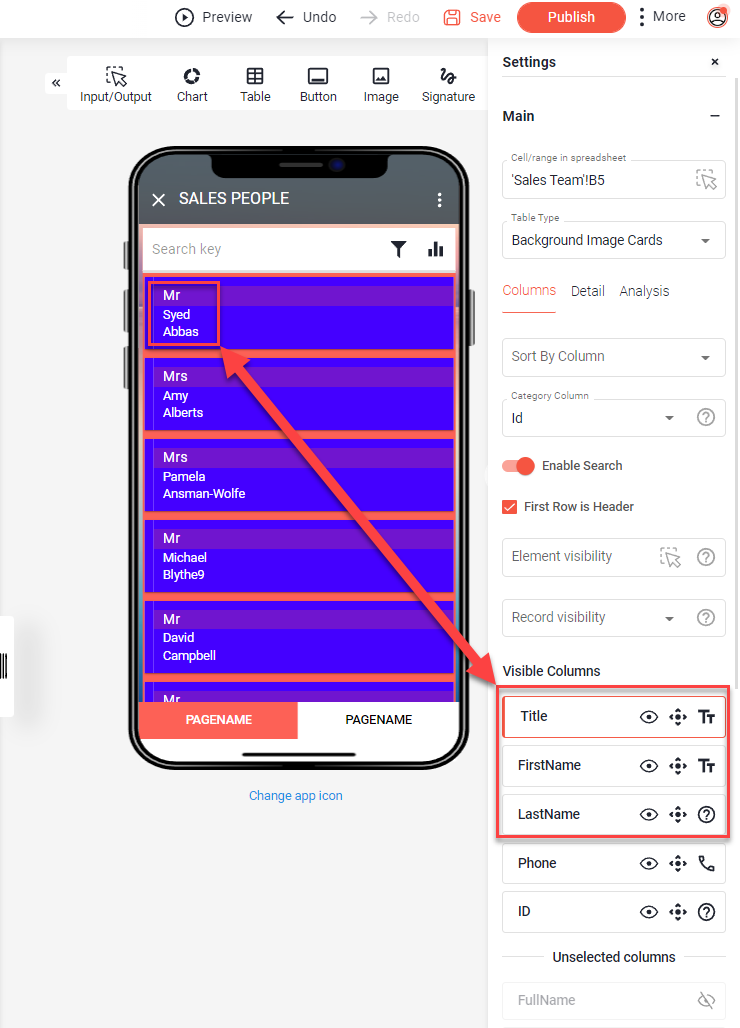
TABLE VIEWS
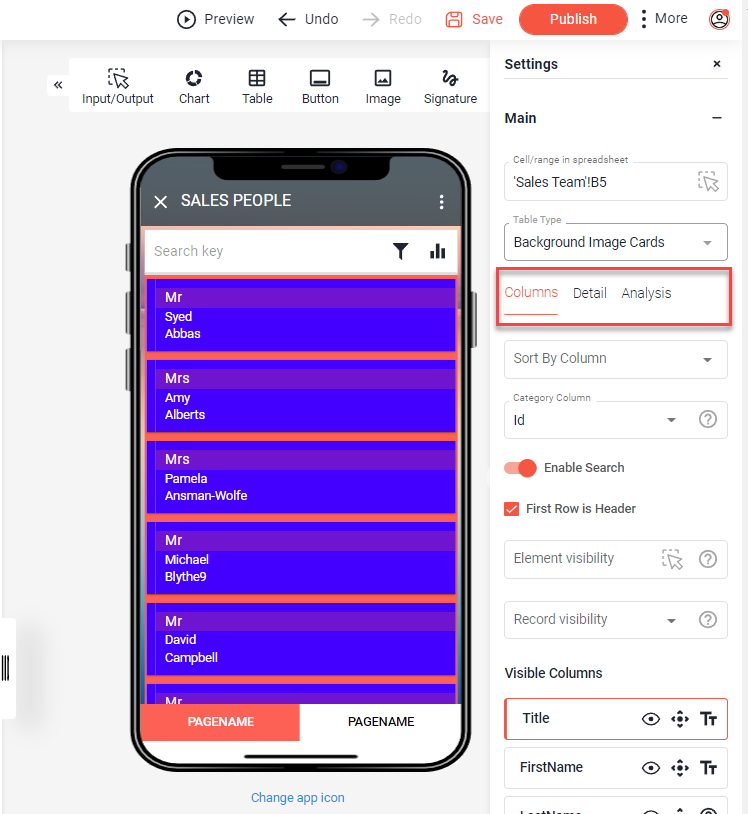
The Table element consists of a total of three views, which you can design separately, the Columns, the Detail, and the Analysis.
In each view, you have different options at your disposal. For each view, columns can be hidden or arranged arbitrarily.
Each column is represented by a box. Column-specific settings can be made within these boxes.
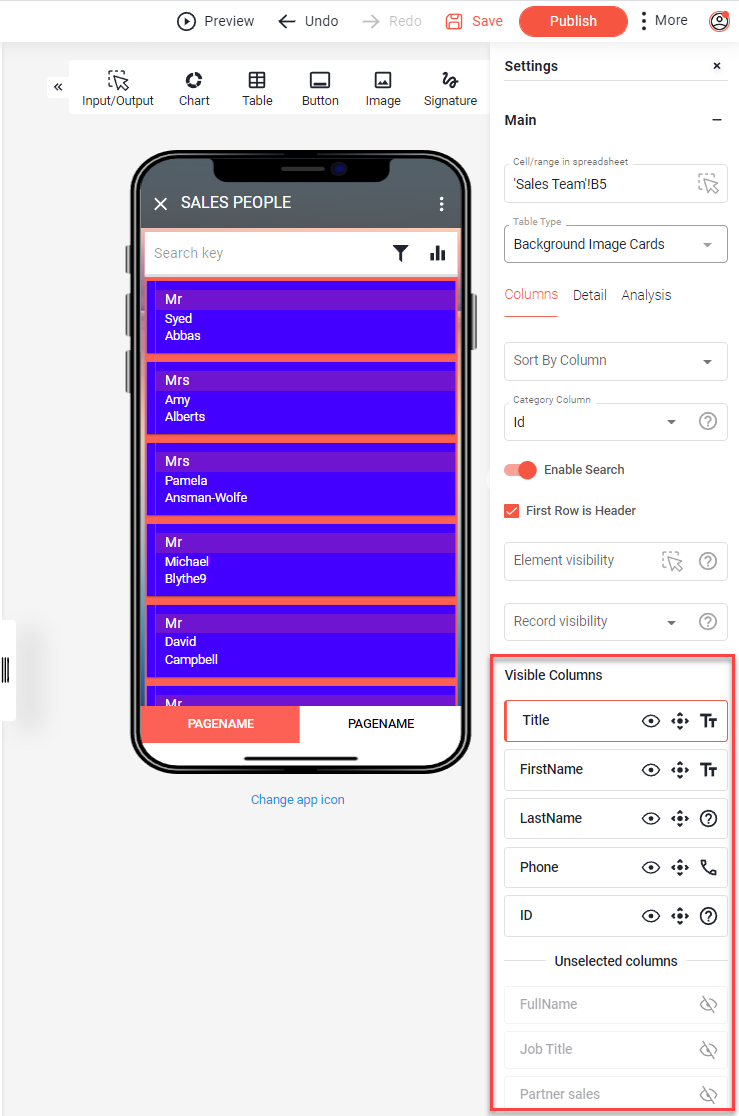
Hide or show columns
To hide a column, click on the eye icon in the column box.
This column is no longer displayed in this view. The box slides down to where all hidden columns are. To re-display a column, scroll down to the list of hidden columns and click on the eye icon again to activate the column.
Note:
When searching for specific data in the app,

all columns visible in the app under Table are searched.
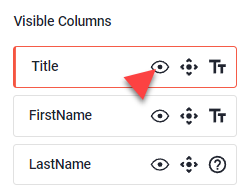
Rearrange columns
You can change the order of the columns using Drag & Drop.
Drag the box with the left mouse button at the icon in the middle, move it to the desired position and release the left mouse button there again.
Note:
You do not need to adjust the order of the columns in your spreadsheet. Change the order in your app instead.
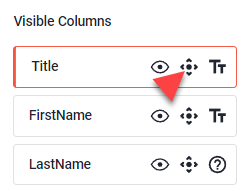
Define column Type
We define a column type depending on the data in the column. This affects the position of the value in the column (e.g. value is displayed right-justified in the list view), or whether the values in this column become "interactive". Interactive means, for example, that links (hotlinks) to image files contained in this column are displayed directly as images and not only as links if the column type is set to "Image".
To change the column type, click on the icon (e.g. "TT") and choose the desired format.
In the detail view, you can open values from columns defined as "Web" by clicking in the browser, "E-Mail" columns forward the clicked value to the e-mail program. Clicking on a "Phone" value starts the phone app and adds the clicked number there. These are just a few examples to show you how to make your app very interactive.
FEATURES OF THE INDIVIDUAL VIEWS
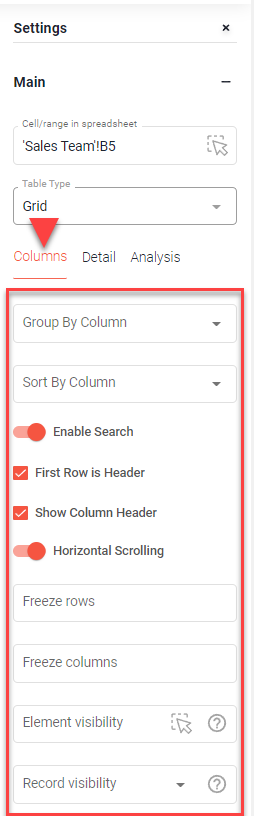
Columns
This view is the first view of your table on your device. Here you can make settings for this view.
- Group table by one column
- Sort the table by a column
- Ascending / Descending
- (de-)activate the search function
- Define the first line of the table as "heading"
- Show (Hide) headline in the list view
- Horizontal scrolling (de-)activate
- Fix the first x columns
- Fix the first x lines
- Manage element visibility
- Manage record visibility (Hide or show records in the table by adding a column in the spreadsheet. Specify the column that returns TRUE or FALSE.)
Detail
The detail view appears when you select one of the entries from the list.
If you convert complex lists with many columns into an app, it is worth splitting the columns between the list view and the detail view in order, not to overload users of the app with information. In the list view, you leave the most critical columns visible, while values from the remaining columns are displayed after clicking on the row. This also creates an "app feeling".
Columns can be shown, hidden, and arranged in any order for a detailed view.
Note:
The settings you make herenot affectn the Table Columns view, so you can change the order as you like. The column type is usually synchronized with the settings from the list view.
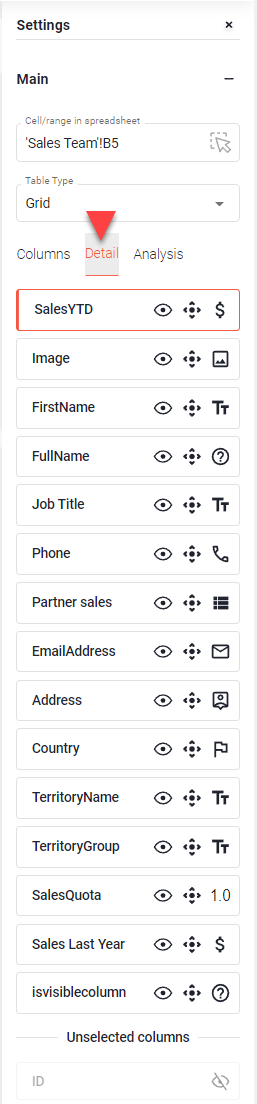
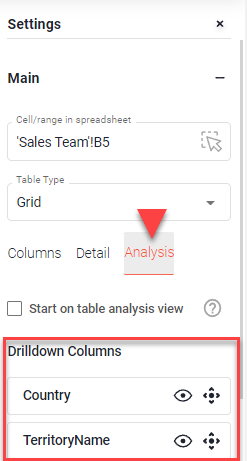
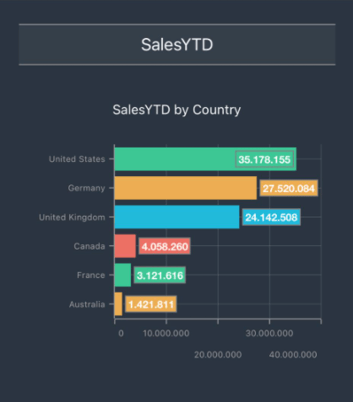
Table analysis
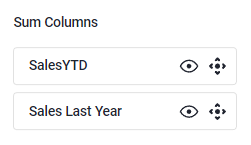
The analysis - with its automatically generated charts - is a kind of "live pivot table". On the one hand, it shows the composition of the data from the list area - by counting the values in the "drill down columns", on the other hand, it is also able to sum values from these columns with values from the "sum columns" containing numeric values.
Columns that are active under "Sum Columns" are summed with each column of the active "Drilldown Columns" so that several diagrams are created here.
App dashboard example:

Note:
Columns activated under "Drilldown Columns" will be available for filtering in the filter row in the list view.
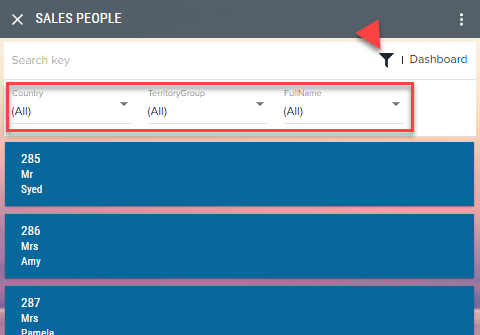
In addition, a diagram is generated for these columns in which the counted values are displayed graphically. You can also filter your list by clickingonn the diagram.
CAPTURE DATA
Note: This is the only method that allows you and users of the app to write back directly to the spreadsheet. Multiple users can edit and add data at the same time without locking the file.
Keep the following in mind:
- Make sure that you only specify the starting point - that is, the cell in which your list begins (Sales Team!B5) and not a fixed defined range (Sales Team!B5:AA30).
- Activate 'Allow users to edit list data'
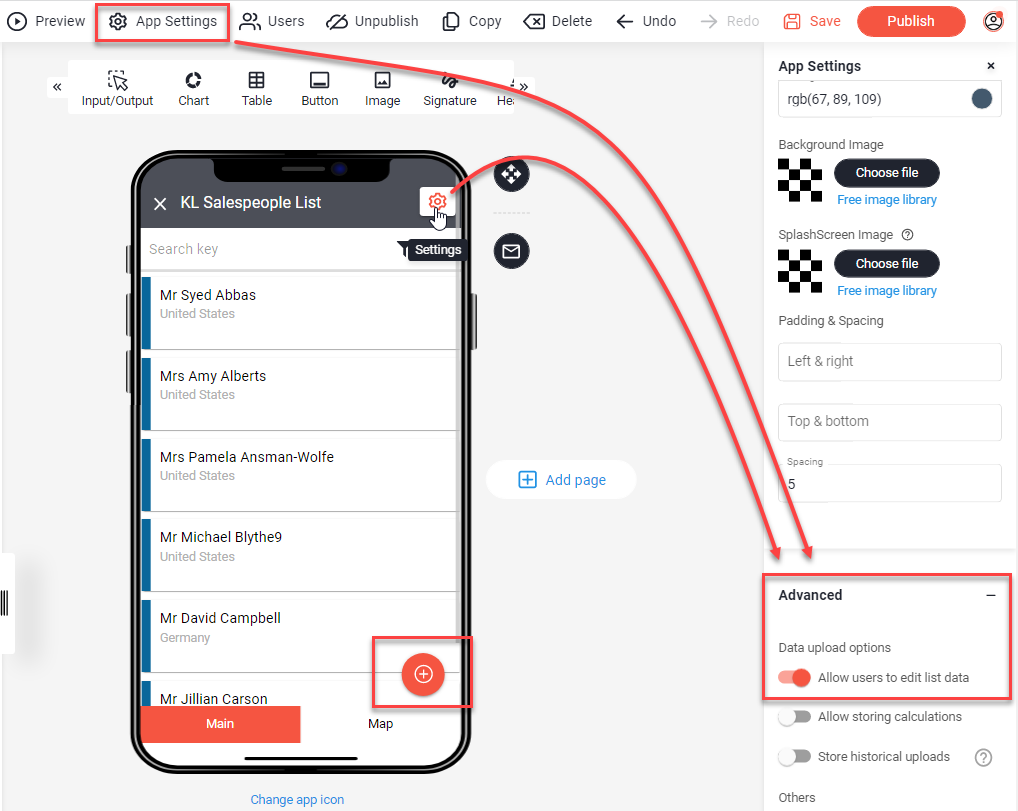
- New entries can be added via the big "+" button within your app
Add new entries to the table
You can add new entries to your table, so you can not just edit existing data, but also use your app as a data collection device.
Note:
Formulas and formatting will be transferred/copied/updated automatically into the new row when adding records.
Exclude individual columns from editing
It is possible to exclude individual columns from editing. Columns excluded from editing are displayed like editable columns in the detail view. However, if you start editing the dataset, only the editable values remain visible so that the user can "work through" faster and only the permitted values can be changed.
- Click on the pencil icon in the corresponding column on Detail.
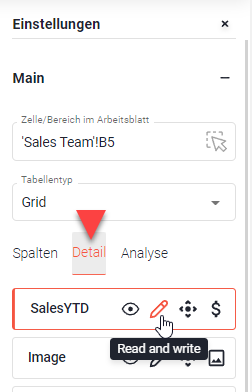
- Select the desired setting:
"Read and write" = Column can be edited
"Read-only" = Column cannot be edited